Location
Other maps: Bing, Google, MapQuest.
Coordinates: 35.4280, -80.9596.
Type: Sight
Tour: Race to the Dan
County: Lincoln
![]() Full
Full
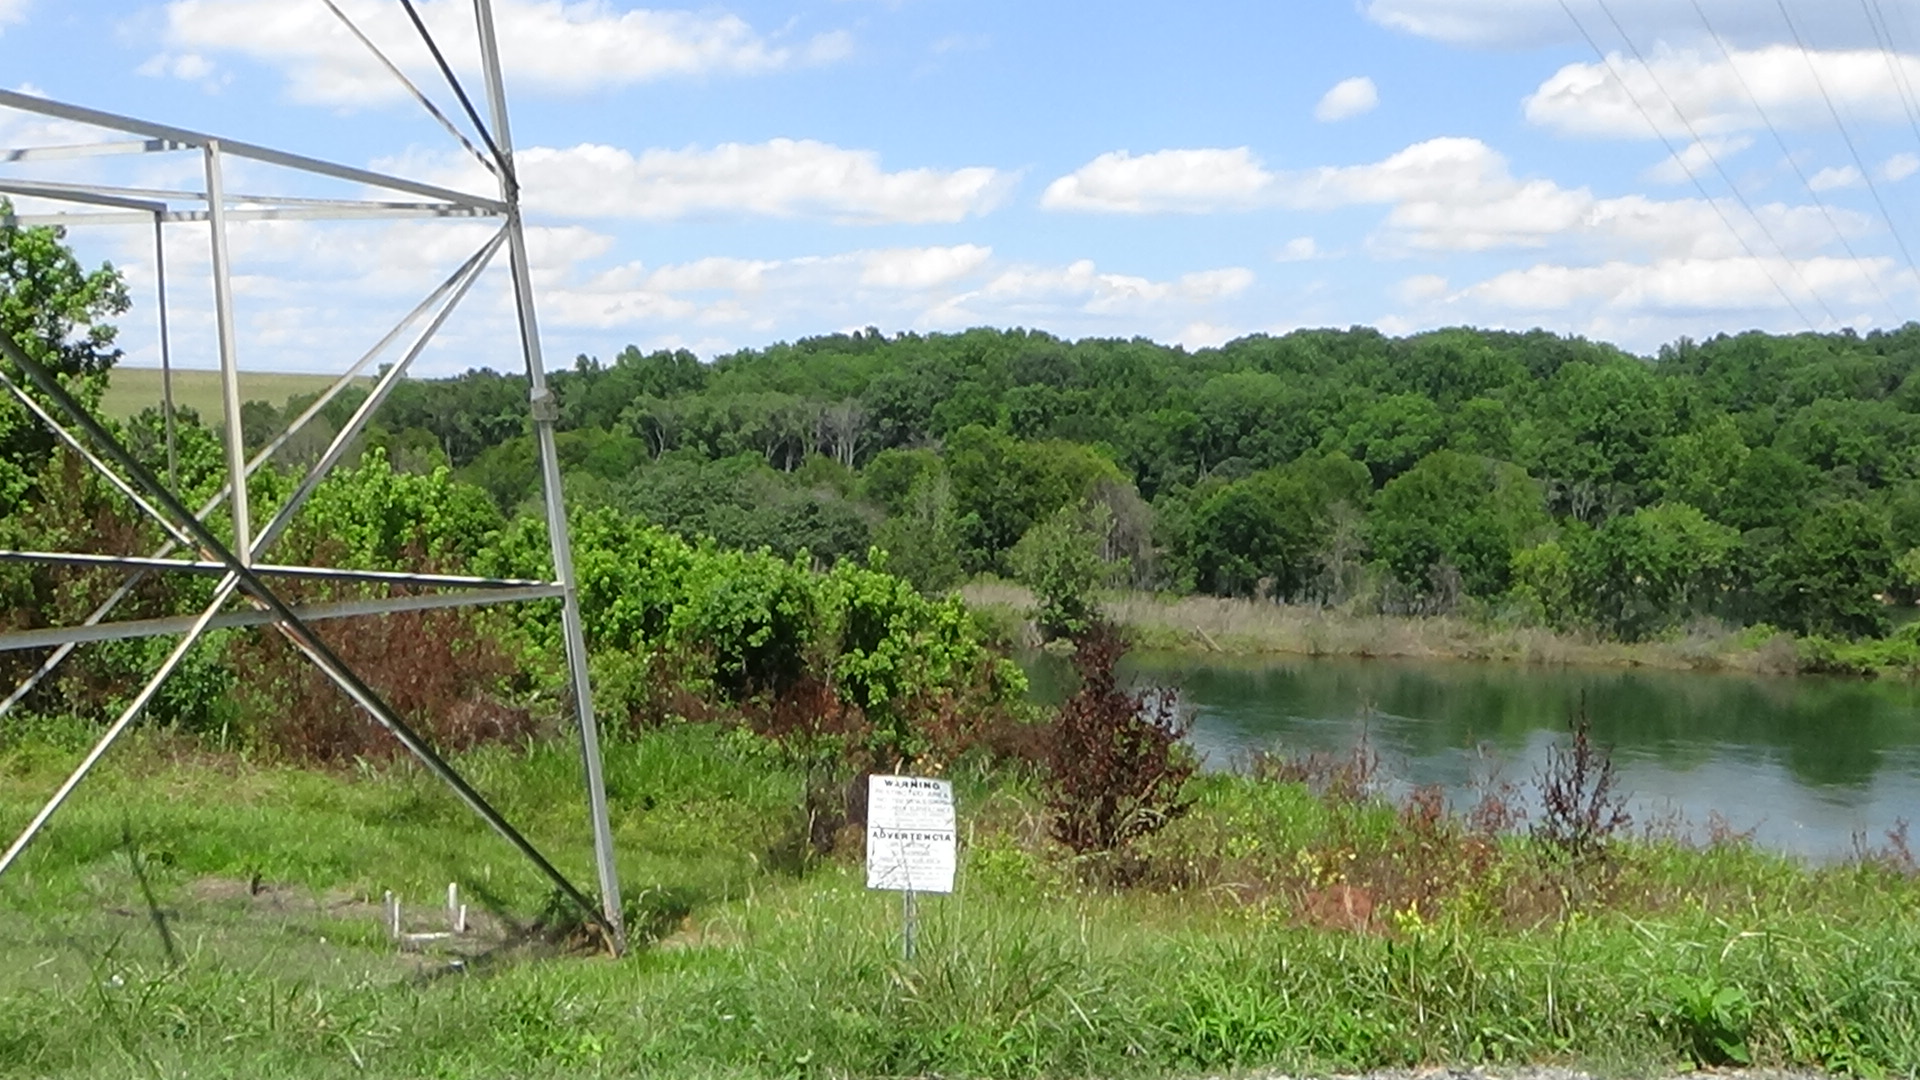
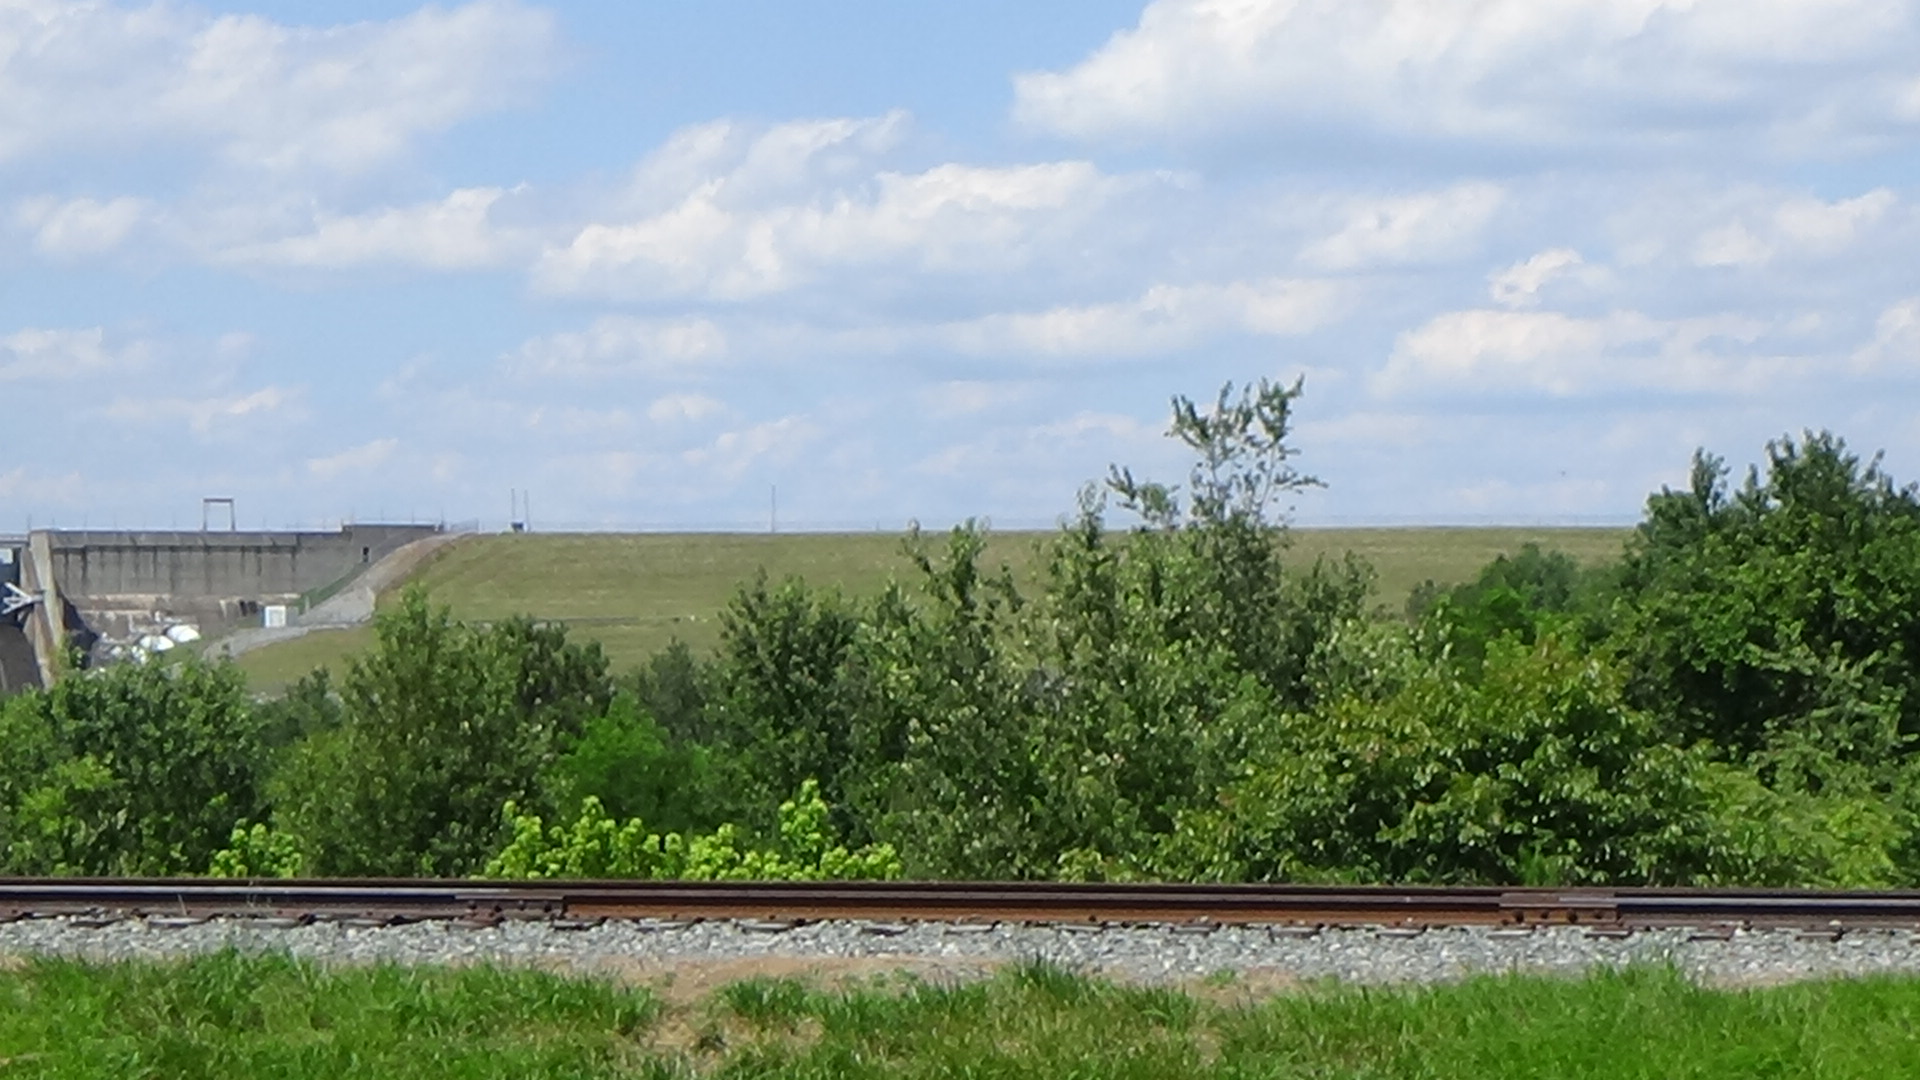
The coordinates take you to the Cowan’s Ford Dam viewing area. Sadly, the dam was probably built partially on the ford used by a British Army to cross the Catawba in 1781, wiping out a key part of the battlefield to the north. (Beattie’s Ford and the heights above it, mentioned on this page, were completely inundated.)
Context
 After defeating and capturing much of a British/Loyalist army at the Battle of Cowpens (S.C.), Continental Brig. Gen. Daniel Morgan is retreating north while the rest of the British give chase.
Situation
British/Tory
Lt. Gen. Lord Charles Cornwallis’ army, after decamping from Ramsour’s Mill in today’s Lincolnton, attempted to cross the Catawba River at Beattie’s Ford north of here on Sunday, January 28, 1781. But the river was too high, so the army fell back five miles to the plantation of Jacob Forney. The evening of the 30th, a small detachment under Col. James Webster moved back to that ford with artillery and the army’s wagons. Cornwallis hoped this would trick the Patriots into believing his entire army would cross there, and shift their part-time “militia” soldiers in the area to defend it. The combination of more rain coming and not knowing if the rest of the Continental Army would appear made him feel he must try to cross despite bad conditions.
Continental/Patriot
Maj. Gen. Nathanael Greene ordered his main force to move to Beattie’s Ford from its camp on the Pee Dee River in South Carolina, which becomes the Yadkin in N.C. He then apparently rode 110 miles with two aides and no guards to Morgan’s camp at Sherrill’s Ford, where Morgan’s force had crossed the Catawba.[1] Some of those troops were defending Beattie’s, the best crossing, further south. Smaller detachments were guarding three other fords, including around 25 at Cowan’s Ford six miles downstream, backed up by 350 militia nearby under Brig. Gen. William Davidson. Greene, Morgan, and Davidson had met, supposedly on a log at Beattie’s Ford, to confer on the placements.
Date
Thursday, February 1, 1781.
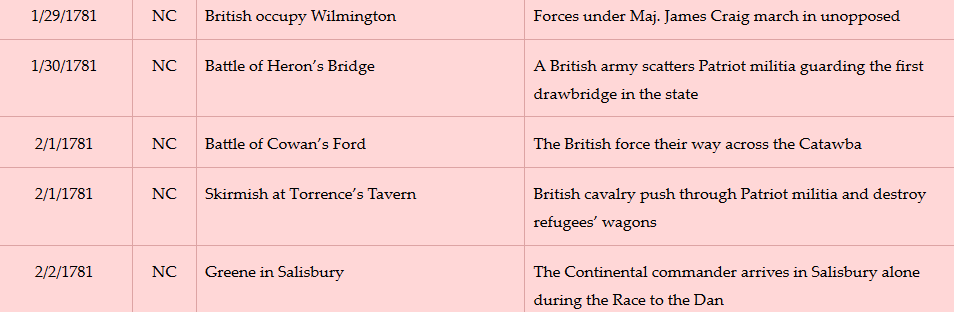
Timeline
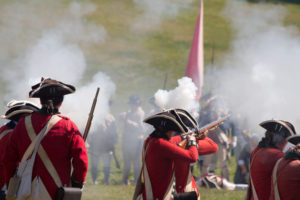
Imagine the Scene
A Shot in the Fog
Walk to the right back corner of the parking area, by the railing and transmission tower.
The river is a little high after several days of rain: two- to four-feet deep and 400–500 yards wide. Wednesday night, Robert Henry says, “‘a man across the river hooted like an owl and was answered.’” One of his comrades goes to a canoe on the far side of the river from you, paddles across, and comes back with the news the British camp is quiet. But the British are wakened at one in the morning to ready for the march.[2]
At dawn, campfires flicker on the hillside across from the island (roughly behind the tower), hard to see through fog that fills most of the valley in front of you. That combines with the roar of the river to block both the view and the sound from the left side. The few American pickets on duty might have been invisible from here.
Look to the left of the dam. Depending on the time of year, you may get a better view by walking toward the other end of the railing.
The British army arrives by passing down a wagon road from the left (exact location unknown) to Cowan’s Ford below where the modern dam is. They left camp at the Forney plantation in time to get here at dawn. The British are led by a local Tory guide, Frederick Hager. They go into the water on this side of the dam’s location.
There are two routes to the other side of the ford. One shorter but deeper continues directly across the river and is mostly used by wagons. The more popular one called the “horse ford,” shallower and flatter, turns south partway across down to the island below you. From there the route cuts diagonally about a third of the way down the right side, and then goes straight across the rest of the river from there. Most of the Patriot guards are sleeping at that location on the assumption that British forces would cross there. Indeed, given that Cornwallis had burned most of his wagons at Ramsour’s Mill, and the rest were at Beattie’s Ford, Hager likely intended to use that landing.
Between the dam site and the island, the British march in small groups (platoons) into the water to help each other against the current. Because the bottom is rocky and deep at this part of the ford, many have picked up long poles or branches they use to probe the bottom ahead of them and steady themselves.
On the far side there is a narrow flat area, only five or six yards wide, at the base of the sharply rising riverbank. The flat runs from the wagon ford landing to a small stream and ravine just north of the current dam on that side. Another set of pickets are there. A road leads toward you up the bank and then switches back to the top before turning east toward the Charlotte-Salisbury Road at Torrence’s Tavern.
Sources differ on how the first warning shot is fired. One story says when Hagar and the first soldiers are about halfway across, a Patriot militiaman on the flat either sees movement or can hear them, and calls a challenge three times. Receiving no answer, he fires a warning shot and begins yelling, “The British!”
A friend of Henry’s, Joel Jetton, says he is awake at daybreak and hears the sounds of the horses. He runs to the river only to find the sentry asleep, who he kicks into the river. Jetton’s powder is wet, so his gun won’t fire; he runs back to the camp yelling, “The British! The British!” The guards had gone to sleep with their guns loaded, so apparently he grabs somebody else’s and fires it as a warning.[3] No matter who fired the shot, two dozen men near the river and at the camp wake up, rush to the riverbank, and open random fire.
A small cavalry unit under Col. Joseph Graham responds from the right. dismounting and running to the top of the bank above them, across the road. By then the first Redcoats are 50 yards out, half an American football field. The Graham company’s first volley thins out the front ranks in the water, halts the column, and scares Hager, who turns back.
The day before, Henry had resolved to hold his ground until the British passed a particular rock in the river. When an officer goes by it on horseback, Henry scrambles up the bank.[4] As the pickets join Graham’s men, all Patriots begin firing at will, stepping back from the edge to reload and forward to shoot. More militia arrive, so Lt. Col. William Polk yells down, “‘Fire away, boys! Help is at hand!’” Among them is a teacher, Robert Beatty, and some of his students, who had been camped at the lower crossing. Beatty has a disability that helps inspire them. As one wrote later in the terms used at the time, “‘I saw my lame schoolmaster Beatty loading his gun by a tree. I thought I could stand it as long as he could and commenced loading.’”[5]
British Lt. Col. Francis Hall rides up your side of the column and shouts orders. Not knowing about the horse ford, he simply orders his men straight across. But Hall pays for his leadership with his life. A cavalry rifleman takes aim and shoots him. Both he and his horse go under, the horse possibly rolling over him. A few of his men grab his body. Hall is the only British officer to die here.
British Sgt. Roger Lamb says Cornwallis “dashed first into the river,” followed by a unit of guards and two small cannons. Lamb is with the men protecting the guns, and “encouraging the men to hold fast to each other, and not to be dismayed at the enemy’s fire.” Just then a shorter cannoneer lets go of his gun in four feet of water and is “forced off his feet, and immediately carried headlong down the river.” Lamb “threw myself on my belly on the surface of the water, and in nine or ten strong strokes, I overtook him” 40 yards downstream—close to the militia. “I got him on his feet, and led him back in safety to his gun.” Apparently the Patriots were entranced by the drama, because while it was happening “not one shot was fired at us.” Immediately after, though, they “began again a very heavy fire upon us.”[6]
He paints a vivid picture of the Redcoats “wading over this ford… up to their breast in a rapid stream, their knapsacks on their back, sixty or seventy pounds of powder and ball in each pouch, tied (around) their necks, their firelocks with bayonets, fixed on their shoulders…”
It was a bad trip for officer’s rides. The horse of the commanding officer of the assault, Brig. Gen. Charles O’Hara, loses its footing and tumbles them both 40 yards downstream.[7] Later Cornwallis’ horse is shot in the crossing, but struggles the rest of the way across before collapsing upon reaching the far side.
Patriots Lose Their Leader
The disciplined Redcoats exit the water and eventually form a 500-foot line in good order on the flat, as Graham reports:
“As each section reached the shore, they dropped their poles and brought their muskets and cartridge boxes to their proper places, faced to the left, and moved up the narrow strip of low ground, to make room for the succeeding section, which moved on in the same manner. By the time the front rank got twenty or thirty steps up the river, they had loaded their pieces and began to fire up the bank.”[8]
Davidson had kept most of his forces at the Lucas House less than a mile away upriver to your right, where he could respond at any of several fords in the area. On hearing gunfire, he leads around 300 reinforcements here on horseback (this number may include Graham’s). You see some pickets remount their horses, and head down the far bank in your direction. Davidson has ordered them to another ford to prevent British cavalry from getting behind his infantry.
The last of the British infantry on the scene and first part of green-coated cavalry are in the river when you hear a horn sound from the far end of the British line. There is a pause in shooting from the British as they load. The horn sounds again, and the Redcoats start marching or climbing up the riverbank. The bank is so steep, especially on the far end at the ravine, in some cases they are pulling themselves up by exposed roots. Davidson withdraws his line another 50 yards and orders his men to take cover behind trees, one end probably within the current tree line to your right.
As the first British heads appear above the bank, Beatty and Henry fire two rounds from behind trees. Then Beatty says, “‘It’s time to run, Bob.’”
But the first British line has topped the bank. “‘I looked past my tree and saw their guns lowered, and then straightened myself behind my tree,’” Henry says. “‘They fired and knocked off some bark from my tree.’”[9]
Davidson is probably at the near end of his second line, around the picket camp,[10] when he is hit in the chest and falls from his horse, dead at 35. Lamb says Davidson “was the first man that received us sword in hand, and suffered himself to be cut to pieces sooner than retreat…”[11]
Beatty turns to escape, but is hit in the hip and falls. He yells for Henry to run, who does a 100-yard dash to the rear.[12]
Polk takes command and withdraws the Patriots east, though many have already left on their own. The militia run so fast they have “‘straight shirt tails’” flying behind them, one says later.[13]
The British complete the crossing over the course of hours, camp overnight to the north of the Lucas house, and bury their (known) dead.
Battle Map
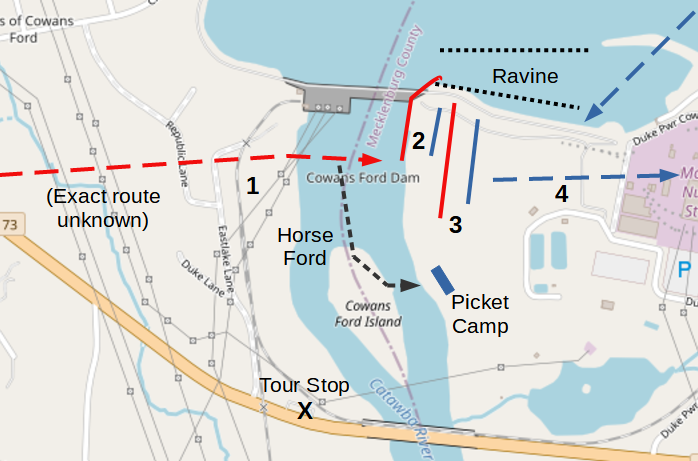
The Battle of Cowan’s Ford: All locations are approximate. 1) British approach and begin crossing while most Patriots sleep in camp. 2) British form line while pickets and Graham’s cavalry fire from top of bank. 3) As British climb bank and ravine, Patriots withdraw to second line; in ensuing volleys, Davidson is killed. 4) Patriots withdraw east.
Casualties
 British: 4 killed, 36 wounded (per Cornwallis, but likely far more—see below).
- Patriots: 4 killed, unknown wounded, 3 captured.
After the Battle
Later that morning, upon hearing Cornwallis was across, Greene orders Morgan’s army to retreat to Salisbury. He also sends word to his main army to head there if in condition to fight, and if not to go up the far side of the Yadkin to that area.
The British follow Morgan’s army the next day. After the British leave, two Patriots appear and find Davidson’s body. (One source reports it was partially in the river, but Graham’s biographer and grandson says it was where he fell.) The British had stripped it, and his wallet turns up 183 years later in London’s British Museum! That night, by torchlight, they bury him at Hopewell Presbyterian Church.
Cornwallis reports relatively few losses. But military records suggest he underestimated badly, probably because many casualties were swept downstream. A Patriot militiaman who lived in the area, Robert Henry, wrote, “a great number of British dead were found on Thompson’s fish-dam, and in his trap, and numbers lodged on brush, and drifted to the banks; that the river stock (sic) with dead carcasses; that the British could not have lost less than 100 men on that occasion.”
An 1888 source says something else interesting turned up the day after the battle: “an elegant beaver hat, made after the fashion of the day, and marked in the inside, ‘The property of Josiah Martin, Governor,’ was found floating on the Catawba River about ten miles below Cowan’s Ford.” Cornwallis reported that Martin, in British eyes still the colonial governor of North Carolina, traveled with the army “cheerfully bearing all the hardships of camp life…”[14]
More Information
- Anderson, William, ‘Battle of Cowan’s Ford’ (EleHistory Research, 2018) <http://elehistory.com/> [accessed 19 March 2020]
-
Babits, Lawrence, and Joshua Howard, Long, Obstinate, and Bloody: The Battle of Guilford Courthouse (Chapel Hill: The University of North Carolina Press, 2009)
-
Blythe, LeGette, ‘Battle of Cowan’s Ford, An (Word Obscured) Military Event’, Charlotte Observer (Charlotte, N.C.), 7 August 1937, Charlotte Mecklenburg Library, Vertical Files, ‘Meck. History, Revolution’
- Graham, William A. (William Alexander), General Joseph Graham and His Papers on North Carolina Revolutionary History (Raleigh, N.C.: Edwards & Broughton, 1904) <http://archive.org/details/cu31924032738233> [accessed 27 March 2020]
- Greene, George Washington, The Life of Nathanael Greene: Major-General in the Army of the Revolution (G. P. Putnam and Son, 1871).
- Henry, Robert, ‘Narrative of the Battle of Cowan’s Ford, by Robert Henry: A Project Gutenberg e-Book’, 1891 <https://www.gutenberg.org/files/50137/50137-h/50137-h.htm#r2> [accessed 25 December 2019]
- Lamb, Roger, An Original and Authentic Journal of Occurrences During the Late American War (New York Times, 1968), reprint of 1809 edition <http://archive.org/details/originalauthenti00lamb>
- Lewis, J.D., ‘Cowan’s Ford’, The American Revolution in North Carolina, 2014 <https://www.carolana.com/NC/Revolution/revolution_cowans_ford.html> [accessed 25 December 2019]
- Lynch, Wayne, ‘Tarleton and the British Legion at Tarrant’s Tavern’, Journal of the American Revolution, 2013 <https://allthingsliberty.com/2013/04/tarleton-and-the-british-legion-at-tarrants-tavern/> [accessed 20 January 2020]
- Nixon, Alfred, ‘The History of Lincoln County, North Carolina’, The Lincoln County News (Lincolnton, NC, 1935) <http://archive.org/details/historyoflincoln00nixo> [accessed 16 June 2020]
- Pancake, John S., This Destructive War: The British Campaign in the Carolinas, 1780-1782 (University, AL : University of Alabama Press, 1985) <http://archive.org/details/thisdestructivew00panc> [accessed 13 October 2020]
- Partridge, Dennis, ‘Route of the British Army through Lincoln County, North Carolina’, North Carolina Genealogy, 2016 <https://northcarolinagenealogy.org/lincoln/british_army_lincoln.htm> [accessed 25 December 2019]
- Rumple, Jethro. 1916. A History of Rowan County, North Carolina : Salisbury, N.C. : Republished by the Elizabeth Maxwell Steele Chapter, Daughters of the American Revolution. http://archive.org/details/historyofrowanco00rump.
- Scheer, George, and Hugh F. Rankin, Rebels and Redcoats (The World Publishing Company, 1957)
- Sherman, Wm. Thomas, Calendar and Record of the Revolutionary War in the South: 1780-1781, Tenth Edition (Seattle, WA: Gun Jones Publishing, 2007) <https://www.americanrevolution.org/calendar_south_10_ed_update_2017.pdf>